Set Up ADB (adb.exe)
APK App Installer requires ADB (Android Debug Bridge) to detect your Android device, pair over Wi-Fi, and install APK files.

When the app starts, it checks for adb.exe. If ADB is not configured, you will see the pink banner “ADB Configuration Required” with a Select adb.exe button.
Step 1: Get ADB (Platform-Tools)
On your PC, download Android SDK Platform-Tools for Windows from the official Android Developers website.
Save the downloaded ZIP file to a location you can access easily (for example, Downloads).
Step 2: Extract Platform-Tools to a permanent folder
Right-click the ZIP file and select Extract All.
Extract it to a stable folder you won’t move later, such as:
C:\PlatformTools\Documents\PlatformTools\
Open the extracted folder and confirm you can see adb.exe inside (usually under a
platform-toolsfolder).
Tip: Keep adb.exe in the same folder as the other Platform-Tools files. Don’t copy only adb.exe by itself.
Device Manager – Connect and Manage Devices
The Android Device Manager is the central hub for overseeing all connected mobile hardware. From here, you can monitor connection statuses, manage multiple devices simultaneously, and switch from wired to wireless mode.
1. Connect Your Android Device via USB
For the most stable initial connection, use a USB data cable.
Steps: Connect your device to your PC, keep it unlocked, and watch for the USB Debugging authorization prompt on the mobile screen.
Detection: The app will automatically attempt to detect the device within a few seconds.
2. Navigate the Device Manager
Select Android Device Manager from the left sidebar to view your hardware list.
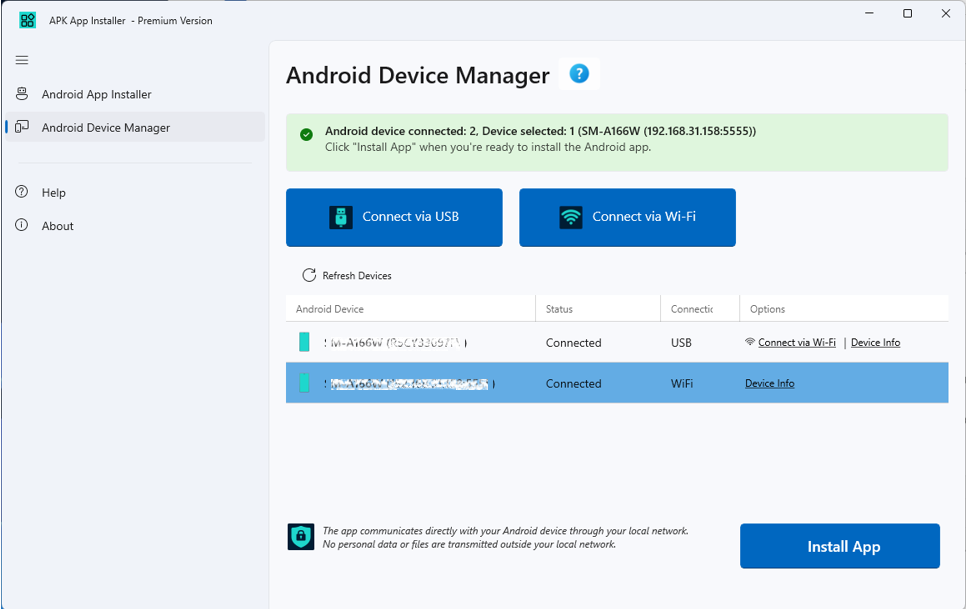
Status Area: If no device is detected, you will see a “No device connected” message. Once detected, your device will appear in the list with its specific model name and connection type.
Refresh Devices: Click the Refresh Devices button if a newly connected device doesn’t appear immediately or if you have just granted permission on the device screen.
3. Manage Multiple Devices
The app supports multiple simultaneous connections.
Selection: Click a device row to select it. You must have a device selected before attempting an APK installation so the app knows which hardware to target.
Device Options: Each row includes a Details button to view hardware specifications (Brand, Model, Android Version) and a Disconnect button to remove the device from the current session.
4. Switch from USB to Wi-Fi (Hybrid Method)
If you want to move your device away from your PC without losing the connection, you can use the USB-Activated Wi-Fi feature. This works on all Android versions.

How to switch:
Ensure your device is currently connected via USB and listed in the Device Manager.
Ensure both the PC and the device are on the same Wi-Fi network.
Click the Connect via Wi-Fi icon (located on the specific device row).
Once the app confirms that TCP/IP mode is enabled, you may unplug the USB cable.
The device will remain in the list with a “Connected” status via Wi-Fi.
5. Advanced Wireless Options
If you prefer a completely wire-free setup (Android 11+), use the global Connect via Wi-Fi button at the top of the Device Manager. This provides access to QR Code scanning and Pairing Codes.
Install APK files
When a connected Android device is ready, install APK files from either the Android App Installer or the Android Device Manager.
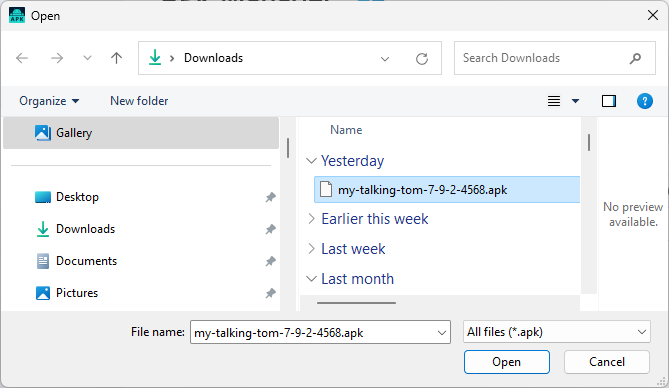
- From Android Device Manager, Click the Install APK button above the device list
- Select an .APK file from the file selection dialog box and click ‘OK’
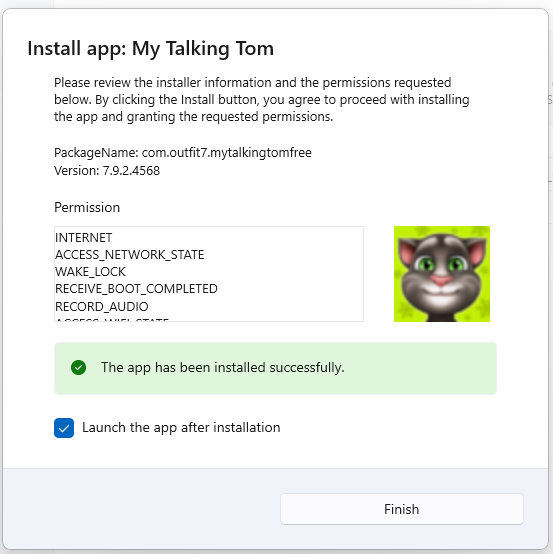
- Review APK app info from the Install app window. When you are ready, click the ‘Install’ button to start the process
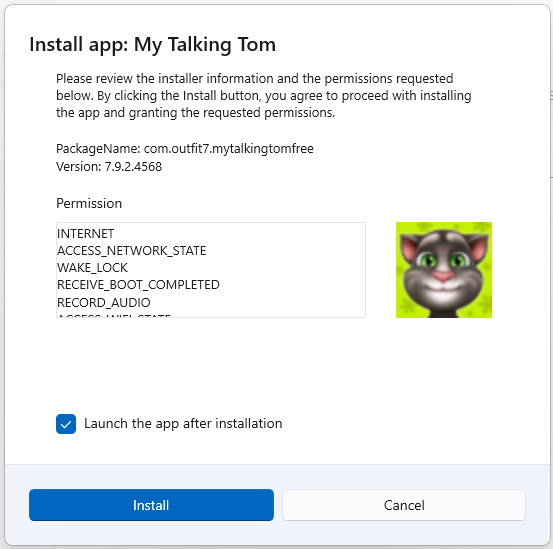
- Wait for the APK file to be installed
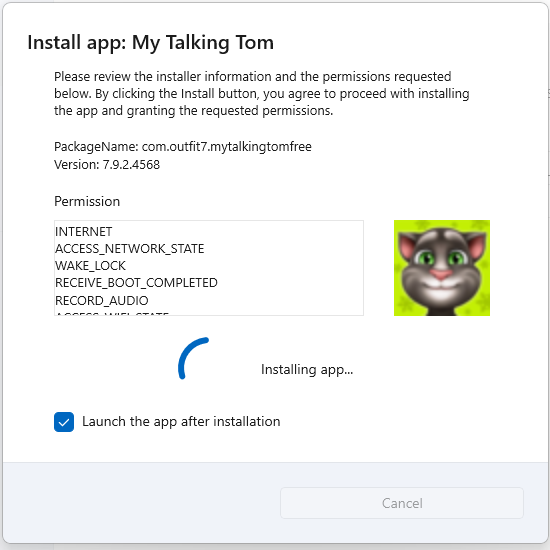
- Once the APK file has been installed, you will be notified. Click ‘Finish’ to complete the process (and launch the app if desired)