
Option 1: Pair with QR Code (Android 11+)
This is the most convenient method for modern devices. It uses the “Wireless Debugging” feature to establish a secure link instantly.

On your Windows App:
In the Wi-Fi connection dialog, ensure the QR Code tab is selected.
A unique QR code will be generated and displayed on the screen.
Note: If your PC is not connected to Wi-Fi, the app will prompt you to connect to a network first.
On your Android Device:
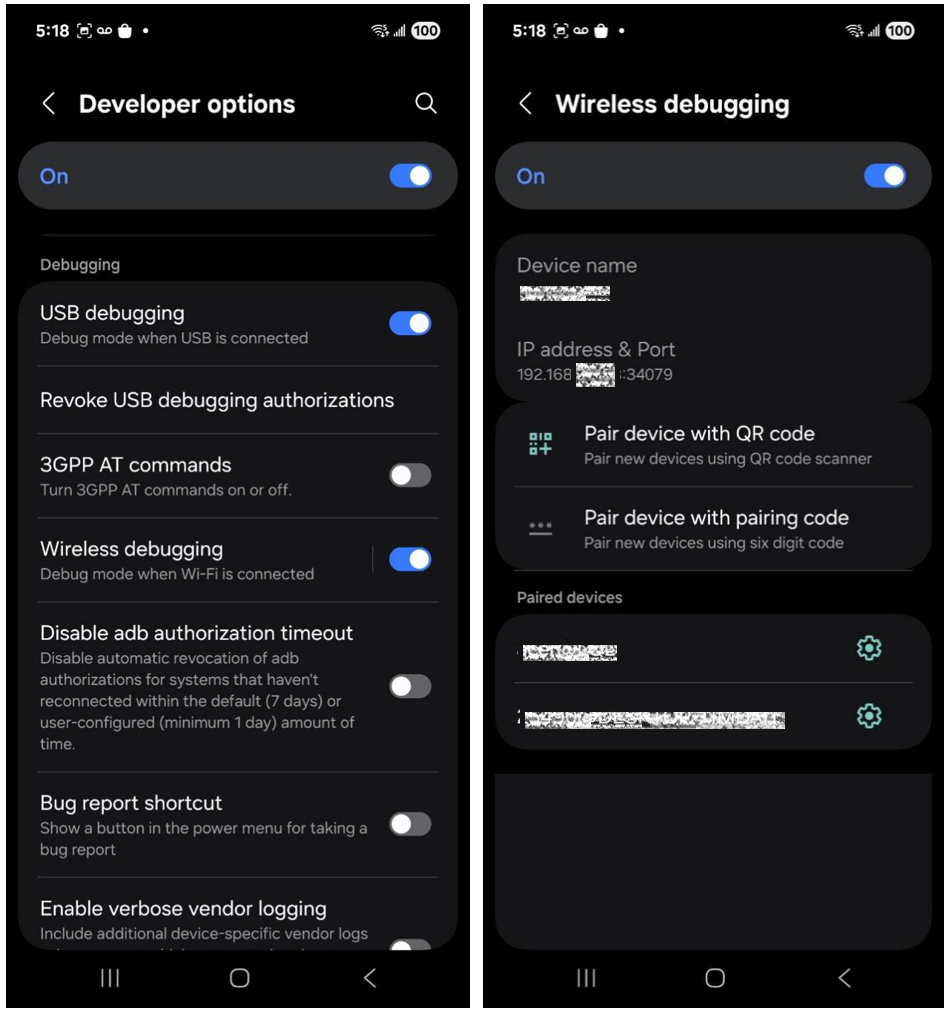
Open Settings and navigate to Developer Options.
Locate Wireless Debugging and toggle it to On.
Tap the text “Wireless Debugging” to enter its sub-menu.
Tap Pair device with QR code. Your camera will open.
Scan the QR code displayed on your Windows PC.
Finishing the Connection:
Once the scan is successful, the Windows app will automatically complete the pairing. Your device will now appear in the Device Manager list with a “Connected” status.
Option 2: Pair with Pairing Code (Android 11+)
This method allows you to link your device by entering a unique 6-digit code along with specific network details.
On your Android Device:
Open Settings and navigate to Developer Options.
Ensure Wireless Debugging is toggled On.
Tap the text “Wireless Debugging” to enter the sub-menu.
Tap Pair device with pairing code.
Keep this screen open; it will display three critical pieces of information:
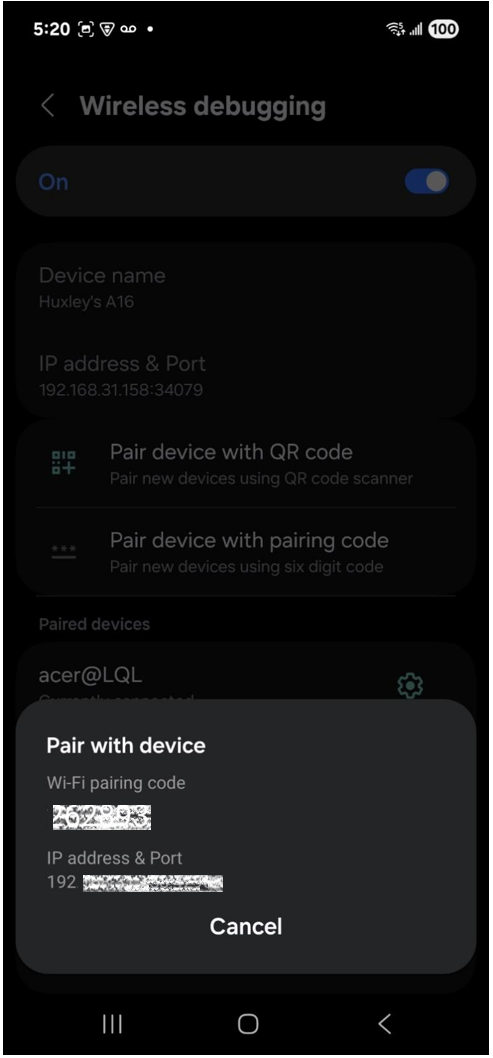
Wi-Fi pairing code (6 digits)
IP address and Port (e.g.,
192.168.1.50:37891)
On your Windows App:
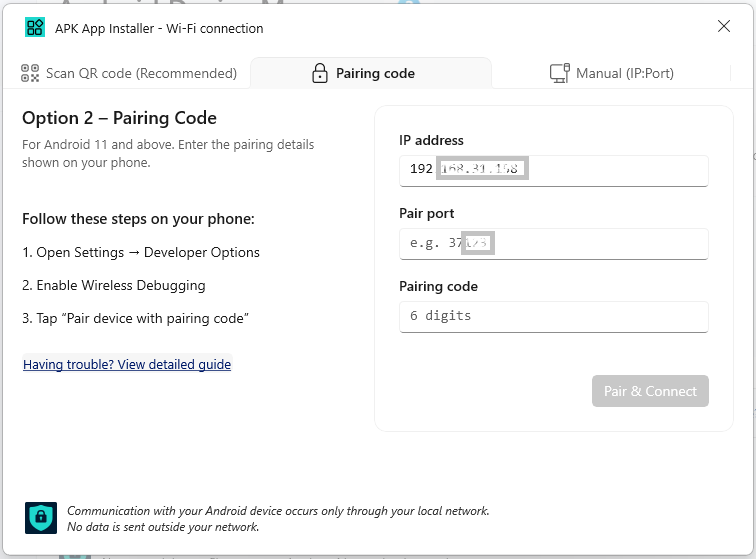
In the Wi-Fi connection dialog, select the Pairing Code tab.
Enter the IP address and Port exactly as shown on your device into the “IP:Port” field.
Enter the 6-digit code into the “Pairing code” field.
Click the Pair & Connect button.
Finishing the Connection:
The app will attempt to pair with the device. Once verified, the dialog will close, and your device will appear in the Device Manager as “Connected.”
Option 3: Connect via IP & Port
This method is the fastest way to reconnect a device if you already know its network address. It is also the primary way to connect if you have enabled wireless debugging on an older device via USB (the “TCP/IP” method).
On your Android Device:
Open Settings and navigate to Developer Options.
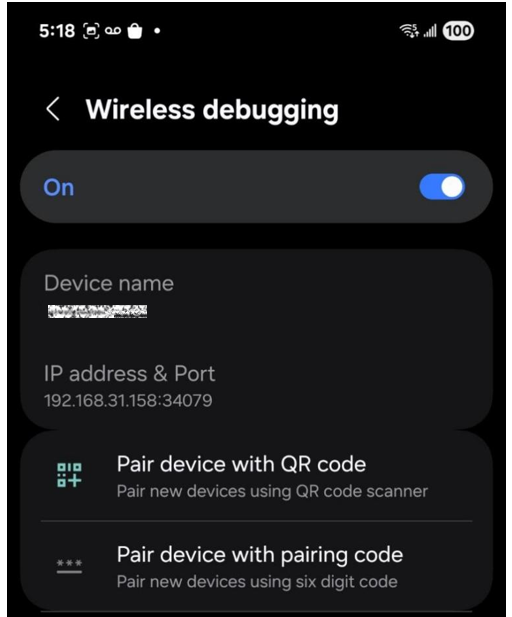
Ensure Wireless Debugging is toggled On.
Tap the text “Wireless Debugging” to view the IP address & Port (e.g.,
192.168.1.50:5555).Note: The port number for this screen is often different from the one used in the “Pairing Code” screen.
On your Windows App:
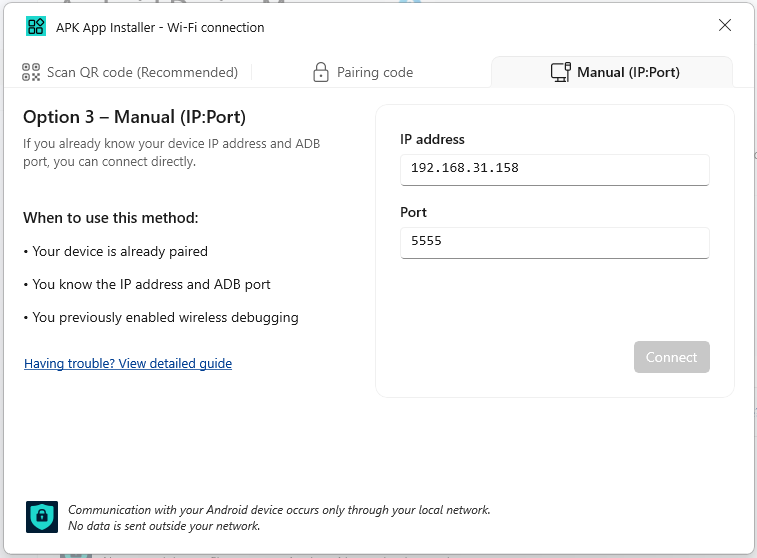
In the Wi-Fi connection dialog, select the IP & Port tab.
Enter the IP address and Port exactly as displayed on your device.
Click the Connect button.
Finishing the Connection:
The app will attempt to ping the device at that specific network address. If the device is reachable and debugging is active, it will immediately show as “Connected” in the Device Manager.